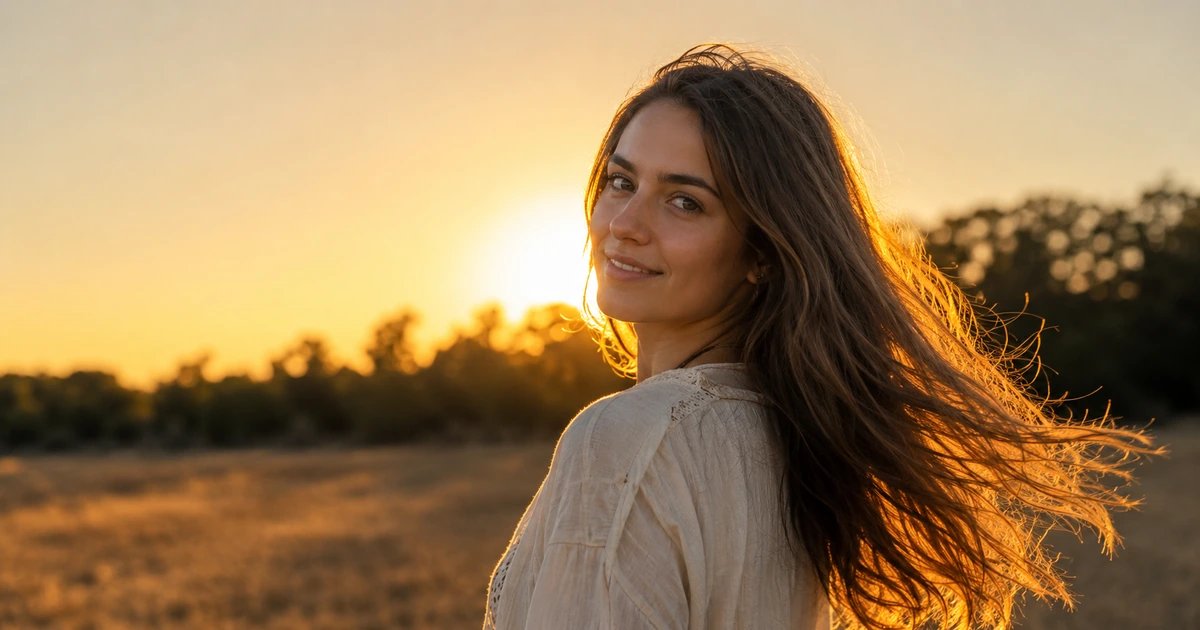
To shoot a backlit golden hour portrait, put the low sun behind your subject and slightly off to one side, meter for the face instead of the sky, and bounce a little light back with a reflector or a bright wall. That is backlight photography in one sentence. The sun draws a bright line around the hair and shoulders, and the metering choice is what keeps the face from going dark.
Backlight photography means your main light sits behind your subject rather than in front of them. Most people avoid it because their first attempt comes back as a black shape against an orange sky. The fix is not better gear. It is telling the camera which part of the picture you actually care about.
What is backlight photography, and why does golden hour make it easy?
Golden hour is the stretch just after sunrise and just before sunset when the sun sits low and the light turns warm. It has no fixed length and shifts with your latitude and the season, so check your local sunset time and start about an hour before it.
The physics is settled. When the sun is near the horizon, its light travels a much longer path through the atmosphere than at midday. NOAA's Storm Prediction Center explains that this path scatters violet and blue light out of the beam, so the light reaching you early or late in the day is "noticeably reddened", and that pure air scatters violet light three to four times more effectively than the longer wavelengths (Stephen F. Corfidi, NOAA, revised September 2014).
Three things follow, and each one helps a portrait:
- The light is soft. More of it arrives as indirect light from the whole sky rather than from one hard point, so shadows on the face have gentle edges.
- The light is warm. Skin tones sit comfortably in that range, without the grey flatness of overcast noon.
- The light is directional. It comes in almost sideways, which is what makes a rim light possible.
Rim light is the bright outline the sun draws along the edge of your subject: the hair, a shoulder, the curve of a cheek. It separates the person from the background, so a dark head no longer blends into a dark hedge.
What gear and camera settings do you need for backlit portraits?
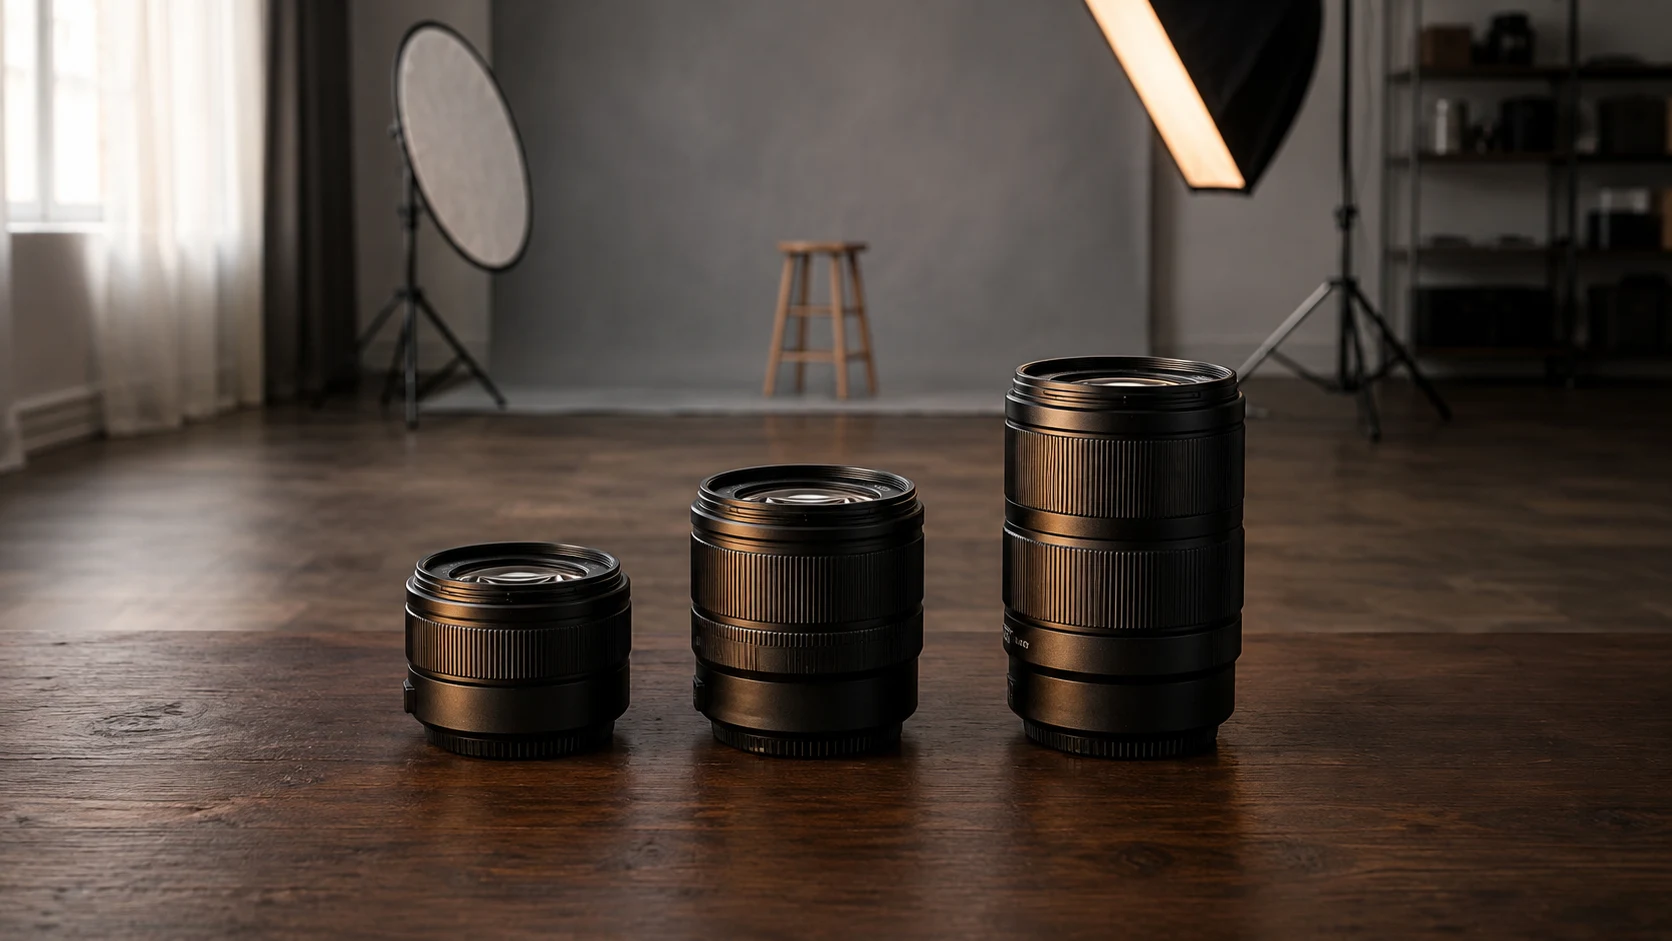
Any camera that lets you choose a metering mode and nudge the exposure can do this. A phone works too, as long as you tap the face to set exposure and hold to lock it, though it leaves less room to rescue a dark face afterwards. For lenses, a fast prime is comfortable: a 50mm or an 85mm flatters faces and blurs the background enough to let the light work. The trade-offs between the three common portrait primes are in our guide to choosing a portrait lens.
Two cheap accessories matter more here than a better body. A reflector is a collapsible white or silver disc that bounces light back onto the face, and a white wall or a pale pavement does the same job for nothing. A lens hood blocks stray light that would wash the frame out, though it stops helping once the sun nears the edge of your frame, where your own hand just outside the picture shades better. No flash needed.
Here is where to start on the dial. These are opening positions, not rules:
- File format: raw. A raw file holds the sensor data before the camera bakes in its own decisions. Nikon lists its NEF files at 12 or 14 bit against a compressed JPEG, and that headroom is what you draw on to lift a face out of shadow.
- Aperture: f/1.8 to f/2.8 for one person, where the background melts and the rim light reads cleanly. Move to f/4 or f/5.6 for groups so every face lands in focus.
- Shutter speed: 1/125s or faster. Quick enough for small movements, and above the reciprocal-of-focal-length floor on an 85mm lens.
- ISO: 100 to 400 while the sun is up, then raise it as the light drops. Noise is easier to live with than motion blur.
- Metering: spot, aimed at the face. This single setting decides whether you get a portrait or a silhouette.
- Focus: single point, on the near eye. Wide-area autofocus will lock onto the bright sky instead.
- Exposure compensation: set it after your first test frame, not before.
Spot metering tells the camera to read one small patch of the frame instead of averaging the whole scene. On a Nikon Z6 that patch is a 4 mm circle covering about 1.5% of the frame, and it follows the focus point you have selected. Put that point on the face and the camera exposes for the face, which is exactly what the bright sky was preventing.
EV stands for exposure value, and one EV is one full stop of brightness. There is plenty of room in both directions: the Z6 allows -5 to +5 EV in third or half stop steps.
Do not stack spot metering and +1 EV
You will often see "spot meter the face" and "dial in +0.7 to +1.0 EV" given as one instruction. Adding a stop on top of a face-metered exposure will blow the face out. Spot metering on the face starts at zero compensation. The nudge belongs on default matrix or evaluative metering, which averages the frame and gets dragged down by the sky.
How do you position the sun, your subject and the camera?
The geometry is what separates a glowing portrait from a washed-out mess. Put the sun directly behind your subject's head and it fires straight into your lens. Move it a little to one side and you keep the rim light while the front element stays out of the beam.
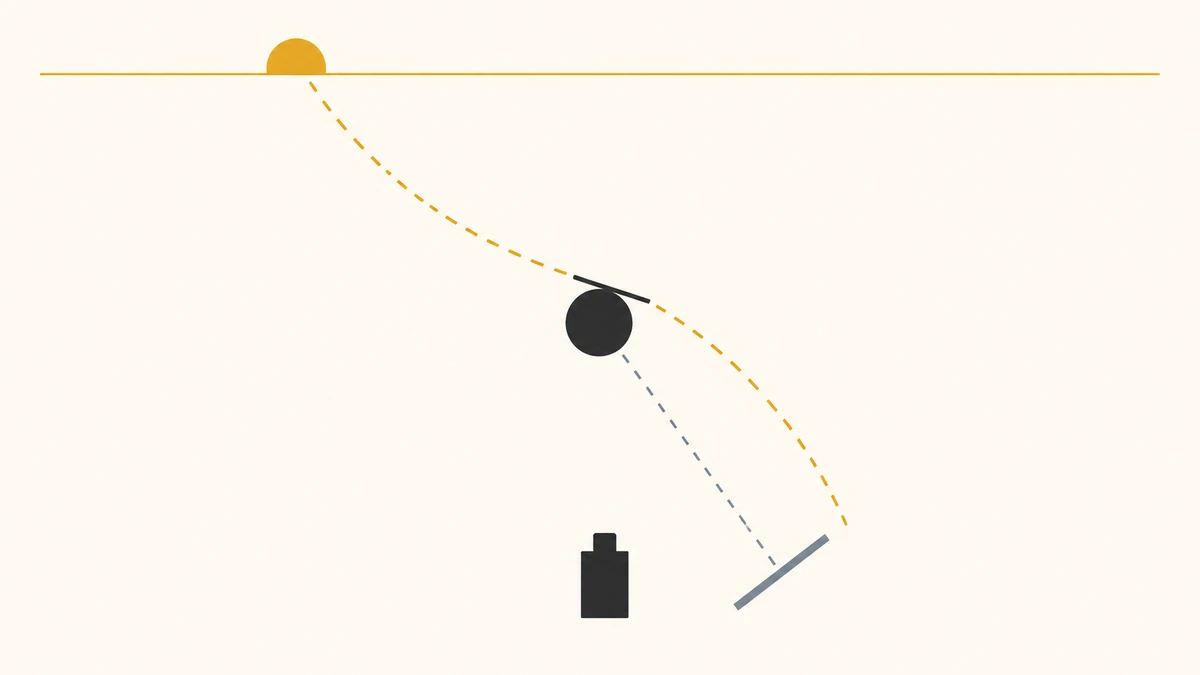
- Put the sun behind your subject, then step to one side. Aim for the sun sitting just off the edge of their head or shoulder rather than dead centre behind it.
- Turn your subject slightly away from you. A small rotation of the head or shoulders lets the light catch the hair and the jawline instead of flattening across their back.
- Bring the bounce in close. A reflector two steps from the face does far more than the same one four steps away. Watch the shadow under the chin lift as it moves in.
- Shoot from eye level or just below. Slightly below keeps sky in the background and holds the rim light inside the frame.
- Take a test frame and read the histogram. The rear screen looks bright against a dark sky and will lie to you. The histogram is the small graph of tones, and an empty right half means the frame is darker than it looks.
- Then shoot in short bursts. The light shifts minute to minute, and a burst is how you get one frame where nobody blinked.
Bursts are the honest cost of this technique. A twenty minute session can leave you with several hundred frames that differ only by a blink or a half smile, and picking through them by hand takes longer than the shoot did. That sorting is a separate job from shooting, which is what AI photo sorting is for: the software groups frames by the person in them, surfaces the sharpest shots and removes duplicates.
Why is your subject a silhouette, and how do you fix the other four problems?
Almost every backlight failure is one of five things, and each has a specific cause.
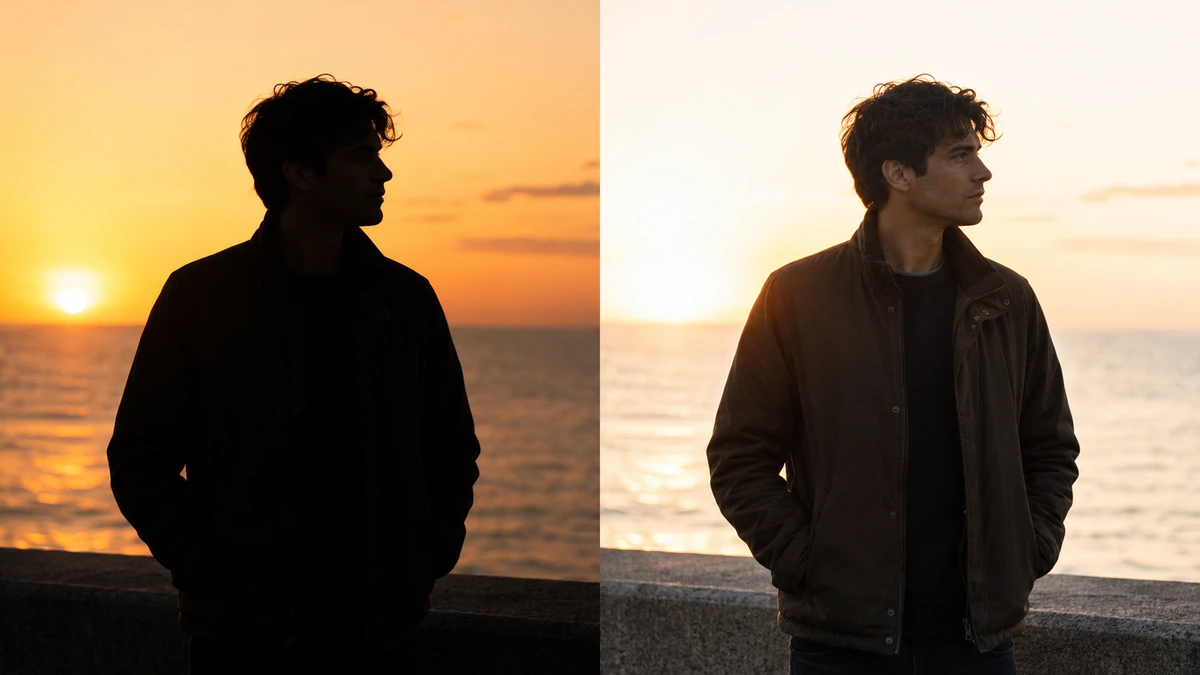
Your subject came out as a silhouette
The camera averaged the whole frame, the sky won, and it exposed for the sky. Switch to spot metering with the point on the face, or add roughly a stop of exposure compensation if you stay on evaluative metering. Then bring a reflector in to close the gap between face and sky.
The frame looks hazy or washed out
Direct sun is hitting the front of your lens and bouncing around inside it, which lowers contrast across the whole image. Fit the hood, or shade the front element with your hand just outside the frame. Wipe the glass too, because a smudge invisible at midday turns into a milky veil when you shoot into the sun.
The face has harsh shadows even in soft light
Soft light still comes from one side, and a face turned away from the bounce will show it. Rotate your subject a few degrees toward the reflector, or move them into open shade where a bright surface lights the front while the sun rims them from behind. That is the most reliable version of this shot.
The autofocus keeps hunting
Autofocus needs contrast, and shooting into the sun strips contrast out of what the sensor sees. Move your single focus point onto the highest-contrast edge available, usually the rim-lit line of the hair against the sky. Shading the lens while it focuses often fixes it. If not, switch to manual focus and use focus peaking.
The sky behind the subject is blown out
Some of it will be, and that is a fair trade. Expose for skin and accept a bright sky rather than protecting the sky and losing the face. For detail in both, wait until the sun is lower, which narrows the brightness gap between subject and background.
What creative variations are worth trying once the basics work?
Once you can reliably keep a face out of shadow, the interesting move is choosing to give that up on purpose.
Deliberate silhouette. Expose for the background instead of the face and let your subject go to a clean black shape. It only works when the outline is readable, so keep a clear gap between arms and body and shoot a profile.
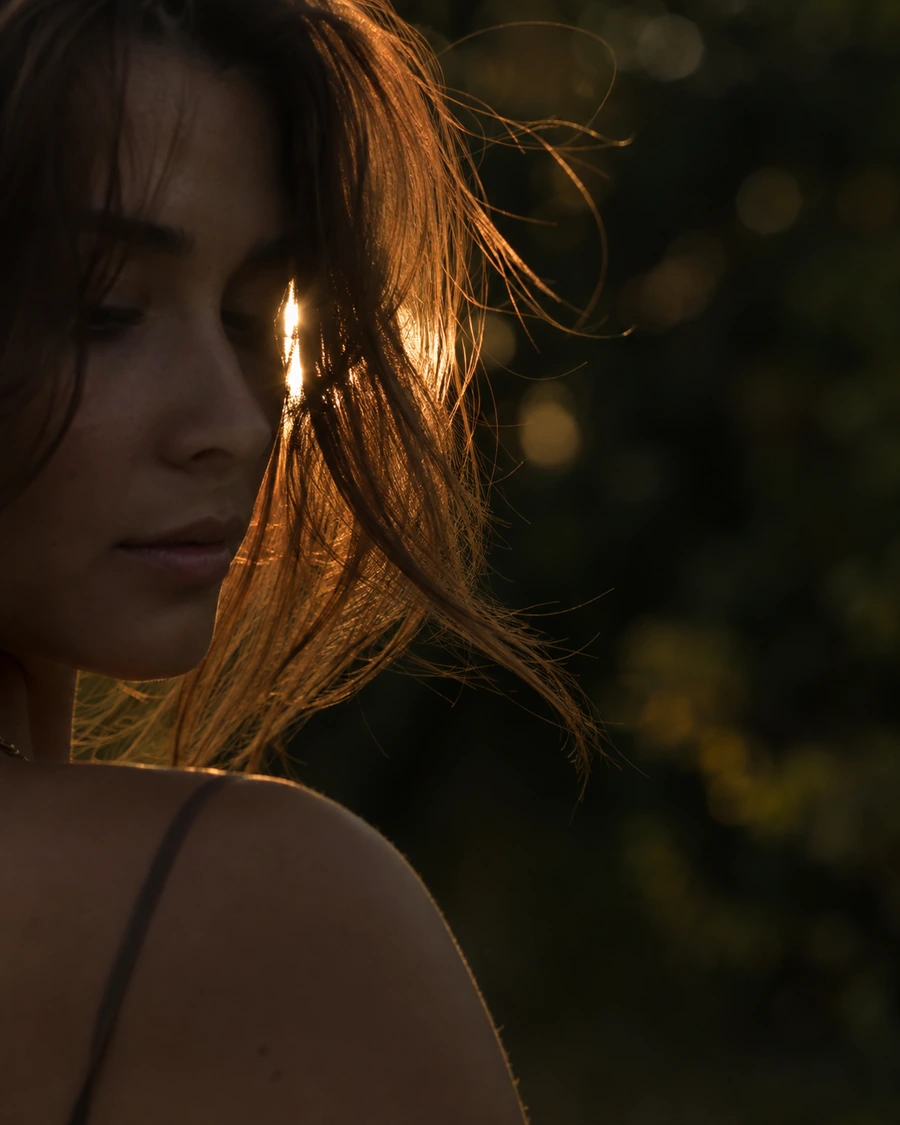
Sun flare through hair. Move until your subject's head covers most of the sun, then edge sideways until a thin sliver escapes. That sliver is where the flare comes from, and a small movement separates a warm streak from a blanket of haze.
Reflected light off water. A lake, the sea or a wet pavement behind your subject gives you the sun and its reflection, softening the rim light and doubling the warm tone.
Movement. Ask your subject to walk toward you, turn, or run a hand through their hair. Backlit hair in motion catches light in a way a still pose never does, and this is where burst mode earns its keep.
Lens whacking carries a real risk
Holding the lens slightly off the mount lets light leak onto the sensor, which is where the streaks come from. It also means no autofocus, no aperture control, and an open sensor collecting dust the whole time. On a mirrorless body nothing sits in front of that sensor, so keep this as an experiment rather than part of a paid shoot.
How do you edit a backlit golden hour portrait?
Editing a backlit frame is mostly restraint, because the light already did the flattering part.
Lift the shadows on the face first, and stop as soon as the face reads normally. Pushed too far, shadow recovery goes grey and undoes the depth the rim light gave you. Pull the highlights down next to recover some sky, and expect the brightest edge of the rim light to stay clipped.
Warm the white balance slightly if the camera has neutralised the scene, which auto white balance often does at sunset. You are restoring what you saw, not inventing it. Add a little clarity or dehaze if flare has left the frame milky, watching the skin as you do, since both coarsen skin texture quickly. A subtle vignette pulls the eye back when the background is bright.
Keep skin retouching light. Golden hour is already kind to skin, and heavy smoothing on a softly lit face looks plastic fast. Most of this is possible in free software, compared in our roundup of free photo editing apps.
Your golden hour backlight cheat sheet
- ✓Timing: start about 60 minutes before sunset and keep shooting through it.
- ✓Aperture: f/1.8 to f/2.8 for one person, f/4 to f/5.6 for groups.
- ✓Metering: spot, on the face, starting at zero exposure compensation.
- ✓Sun position: behind the subject, just off the edge of the head or shoulder.
- ✓Bounce: a reflector, a white wall or a pale pavement, brought in close.
- ✓Capture: raw, single-point autofocus on the near eye, short bursts, histogram checked.
What happens after the shoot is the part beginners underestimate. One golden hour session for a family, a team or a wedding party leaves you with hundreds of near-identical frames and several people who each want only their own pictures. Lenzeit is an AI SaaS application built for that half of the work: you upload the shoot in one go, MagicSort™ groups every frame by the person in it, and each person opens a private gallery of only the photos they appear in, using a selfie or an access code.
Backlight is the fastest upgrade available to a portrait photographer, and it costs nothing but a change of position. Put the sun behind your subject, tell the camera to read the face, bounce light back, and check the histogram before you trust the screen.